I don't think Shimano discloses who there blank manufacture is so you would need to research the action and purpose of the blank. I'm not familiar with that series of rods but i thought they were originally designed for butterfly jigging. I know some manufactures make blanks for this purpose and you might be able to find something close. It will be hard match it exactly though. Not saying the outcome would be worse it could be much better for your needs.
Announcement
Collapse
No announcement yet.
Tips for those looking into building their first rod
Collapse
This is a sticky topic.
X
X
-
Creating Custom Cork Grips
Custom cork grips can be a simple or involved process depending on what you want to incorporate into the grip. Sometimes the addition of a simple narrow dark colored accent ring will turn a plane cork grip into one that stands out.
In the next write up I will document the creation of a custom split grip for the 845 jigging blank we are building. I will also use this build for the next several write-ups.
With this build (Unlike the budget builds) I decided to forgo the inexpensive pre made EVA grips and go with a mixture of some nice burl cork rings. I selected a light mix for the majority of the grip and some burnt and plain cork rings for accents. All rings used were full sized 1/2” width by 1 1/4” OD. These rings run about $1 each depending on the seller and quality. I purchased a total 24 rings for this grip (11 Light mix, 8 burnt, 4 standard plus a rubberized ring for the butt cap). I bought several extra rings of each type to allow for fudges and possible bad rings. Always order more rings than you need. If you try to get the exact amount needed and mess up a ring you are out of luck. Better to get extra now and avoid another order that will cost you more in shipping costs and time. Besides you will use them in future builds.
You will need to do some planning before ordering your cork rings. Each full ring is 1/2” wide so multiply the desired grip length by 2 and throw in a couple extra rings for insurance. A 10” rear grip would require 20 rings plus 2 or 3 for backups. Cork rings also come in various widths. You can get 1/8”, 1/4” etc pre cut to use for accent rings. These are great if you don’t want to cut your own from the full size rings.
Back to the build. As stated above we decided to go with a split grip on this build. To make it stand out we are going to incorporate a mix of accent rings and some checker board rings. We cut 1/8” accent rings from full 1/2” rings using a Mandrel on a drill to spin the ring and a fine tooth saw blade. The rubberized cork ring is a mix of cork dust and rubber. This will serve as our butt cap in this build. You could use a standard rubber butt cap as well but I fell the rubberized cork ring looks better on cork grips and still gives you some level of protection. I will cover the method to make the checker board rings later in this writeup.
Here are a couple pics of the grip materials we will use.
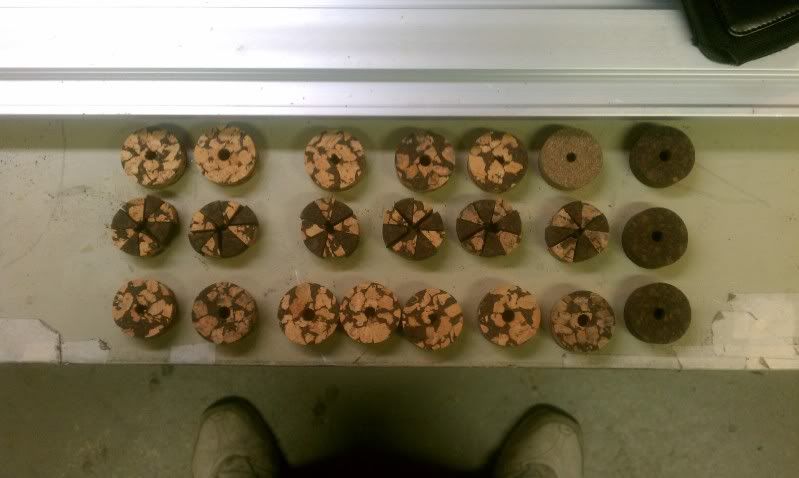
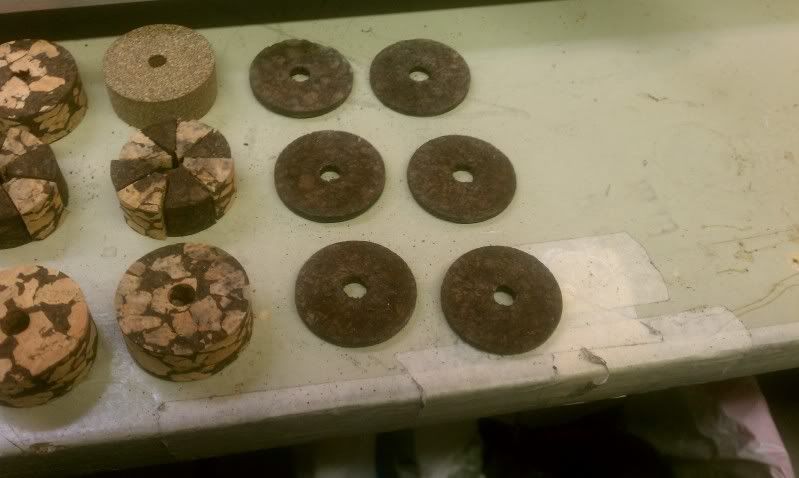
The grip layouts will consist of the following.
Front and rear grip (Length = 2 1/2”)
| Burl | Thin Burnt | Thin Reg Cork | Checker | Checker | Thin Reg Cork | Thin Burnt | Burl |
Butt Grip (Length = 3”)
| Burl | Thin Burnt | Thin Reg Cork | Checker | Checker | Thin Reg Cork | Thin Burnt | Burl | Rubberized Cap |
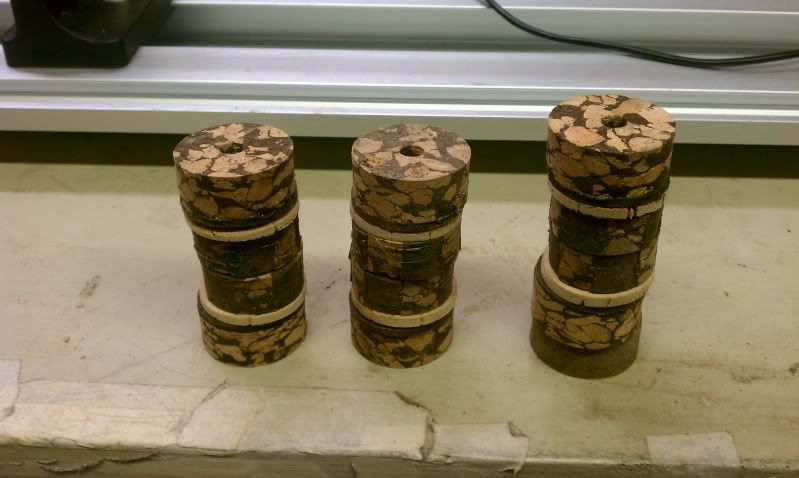
Now that we have the design of the grip laid out its time to start putting the pieces together. I mentioned how we create the accents rings but how do you make checker board rings? Well you could buy them pre made and this is a great option but lets make some instead. You can buy some nice quality cork jigs but we are going to make one for this writeup. All you need is some scrap wood, hole saw and some patience and you can slap this together.
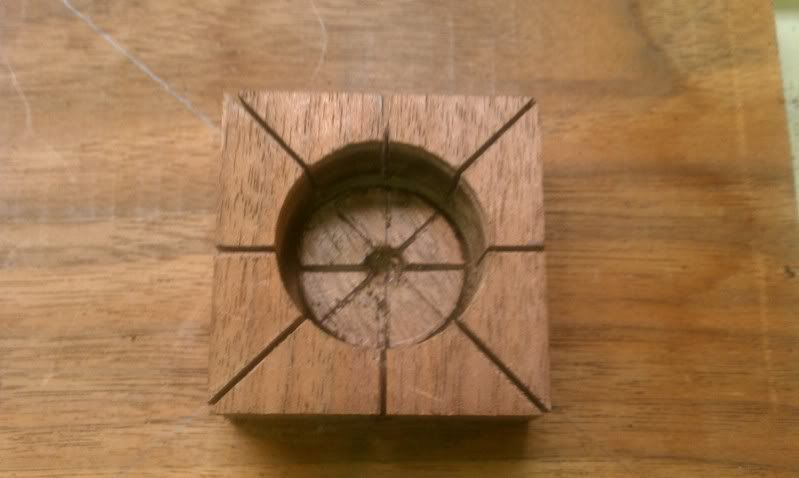
This is a simple cork jig consisting of a base plate, a 2” x 2” block drilled on center with a 1 1/4” hole saw, and cross cut into 8 segments. This is all held together with some hot glue. It took a total of 10 mins to put together. Its not the most accurate jig but it will work for our build. You will also need a tall blade fine tooth saw to cut the wedges in the ring. With the jig taken care of we can start cutting our wedges.
Place a ring in the jig and start your cuts using the guides.
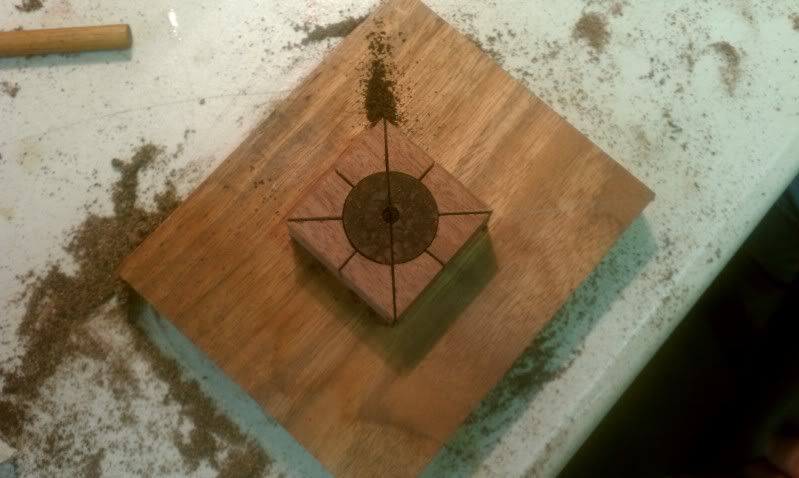
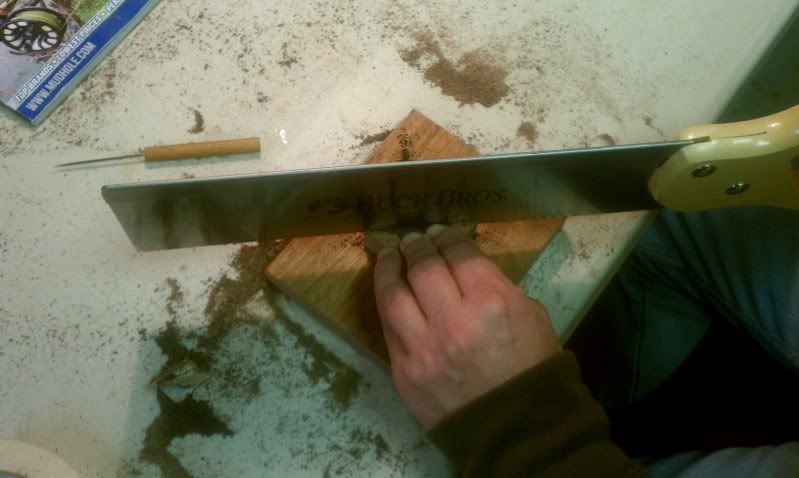
After you make the full 4 cuts you will have 8 wedges and if your measurements were perfect on the jig layout all will be the same. Seeing this is almost impossible we wont wont worry unless the difference in wedge size is way out of proportion. If that is the case you will need to make a new jig.
Comment
-
The result.
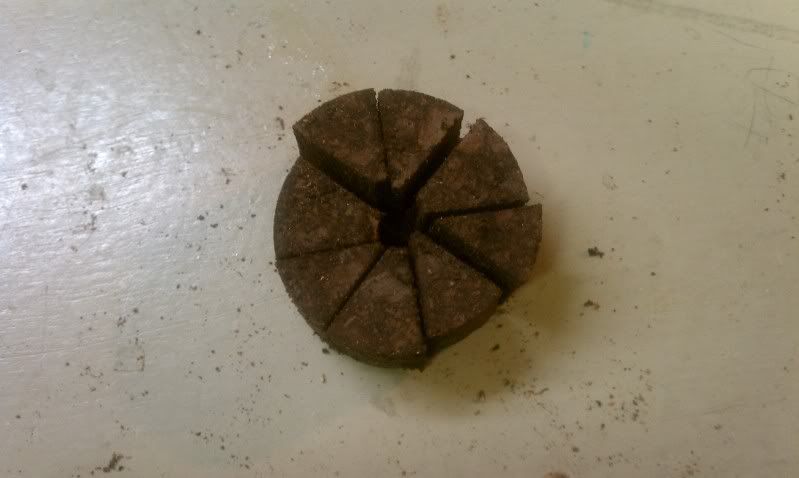
Now do the same with the contrasting ring.
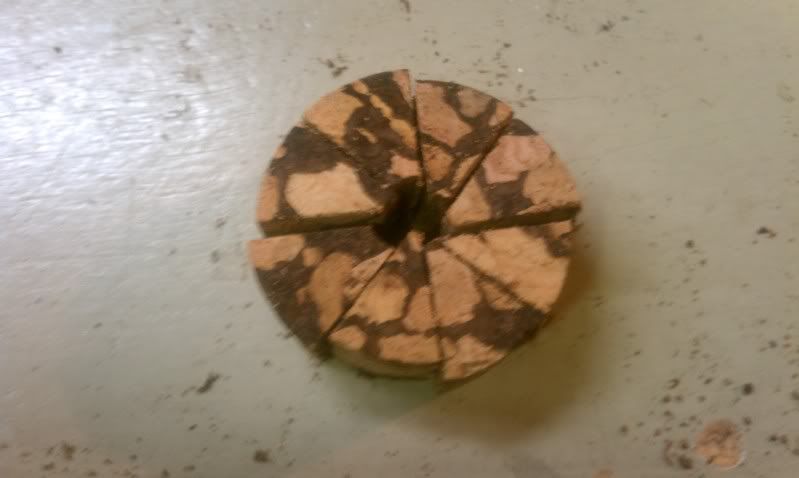
At this point we have made 8 wedges from the burnt ring and 8 wedges from the light mix ring. This will yield 2 full checker board rings. Each checker board ring will consist of 4 burnt wedges and 4 light mix wedges.
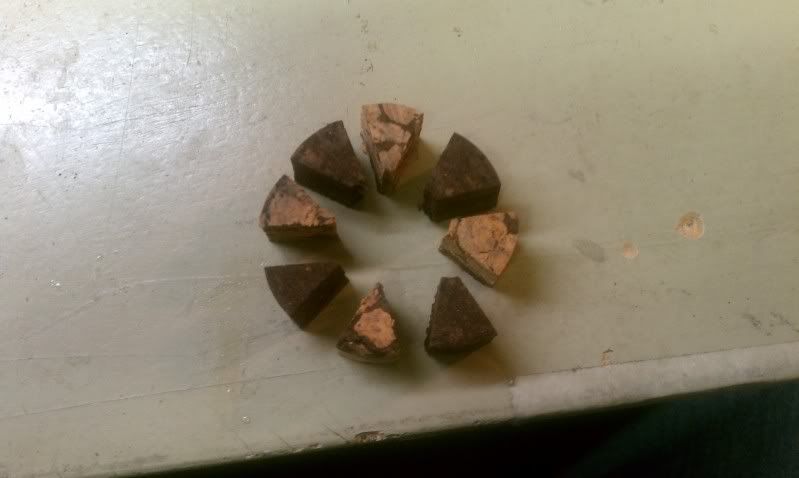
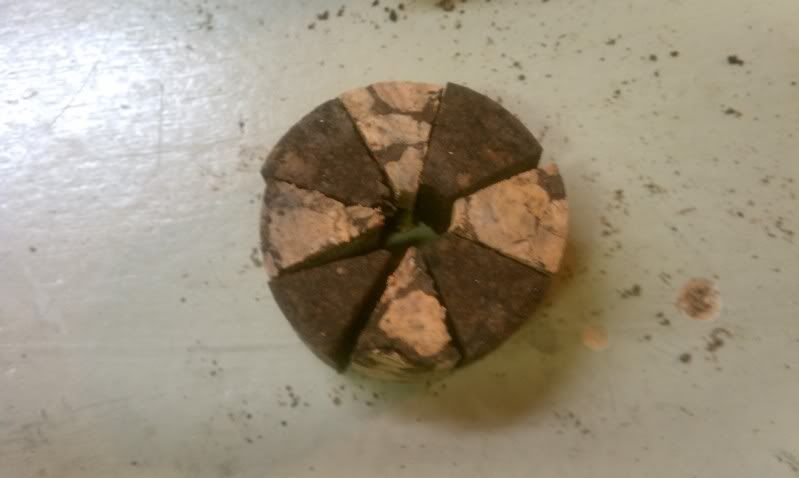
We repeated this process for the rest of the checker board rings 6 total in this grip.
Now we have a pile of wedges laying in front of us but how do you glue everything up and hold it together? The answer is large wire ties. This is where you get nice and messy. If you don’t like rubbing epoxy off your fingers for the next several days rubber gloves might help. We will need to mix up a batch of epoxy to glue the rings up. Some people use Elmer's wood glue but I have not tried that so we wont cover it in this write up. Mix up a batch or epoxy (Rod Bong in this case) and set your large wire ties aside. Generously coat both sides of the wedge with epoxy and attach the contrasting wedge. Repeat the process until you have a full ring consisting of 4 of each wedge type. Now set this on a piece of tin foil to avoid mucking up you work area and cinch up a wire tie around the ring.
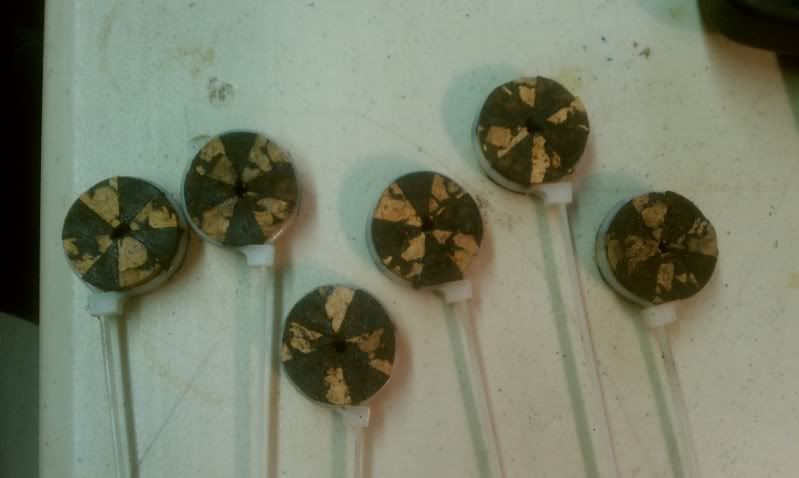
The wire tie will apply equal pressure around the circumference of the ring and ensure everything is held in place. The first thing you will notice is the diam of the ring is smaller than the original ring. This is unavoidable due to the material removal as a result of the wedge cutting process. This is fine as we will be shaping the grips later.
We will also take this time to glue up the trim rings to the full rings sections of the grip since we mixed up more epoxy than needed for the checker board rings sections. You will need a method of applying equal pressure to the rings while the epoxy sets. This can be done with a modified quick clamp, Threaded rod and some large washers.
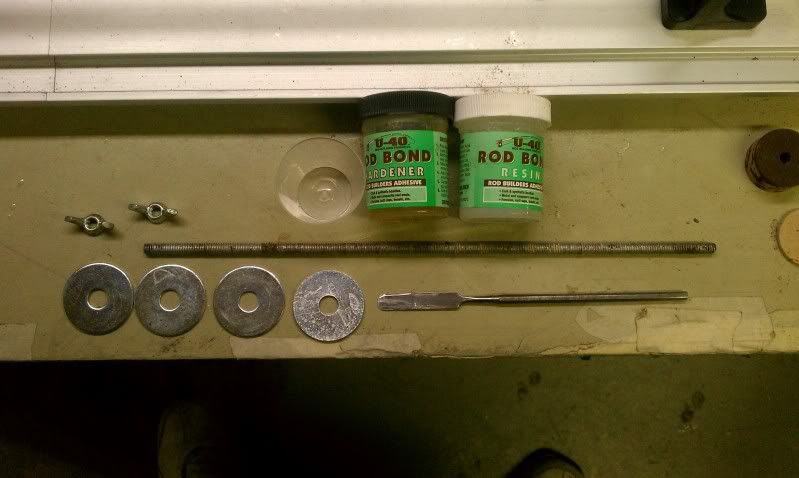
Place a washer at the bottom of the stack and slide a ring onto the threaded rod. Make sure you don’t apply epoxy on the bottom of the ring. Unless you want a large metal washer attached to the grip. Now apply epoxy on the top of the ring. Make sure to apply a thin coat evenly across the whole surface. Keep a small area close to the threaded rod free of epoxy (about an 1/8). The grip could seize to the threaded rod if you get to much epoxy on the threaded rod section. The epoxy will spread into this void a little when you clamp it up to set. This section will also be removed during the reaming process so it it not needed for strength.
Comment
-
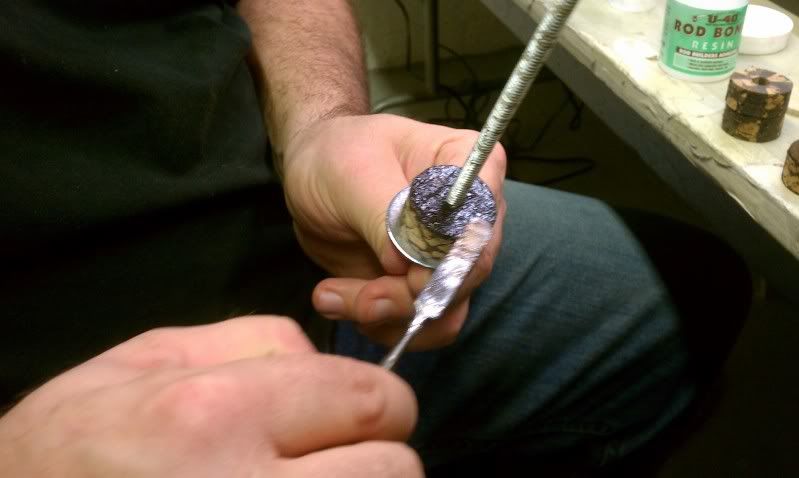
Now start stacking and gluing up the rest of the grip components. In this case we are only addressing the accent trim rings while the checker board rings are setting up. We will alternate stacking washers and rings on the rod until we have everything completed.
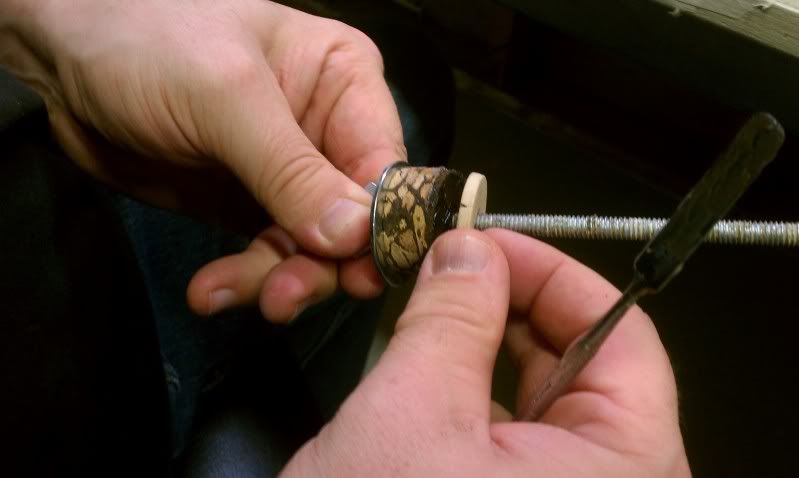
When the final ring has been glued up place a final washer on to of the stack and place the threaded rod into the modified quick clamp. Give a good squeeze in the clamp and wipe the excess epoxy that was squeezed out with a paper towel and some denatured alcohol. Set this aside for 24hrs to cure.
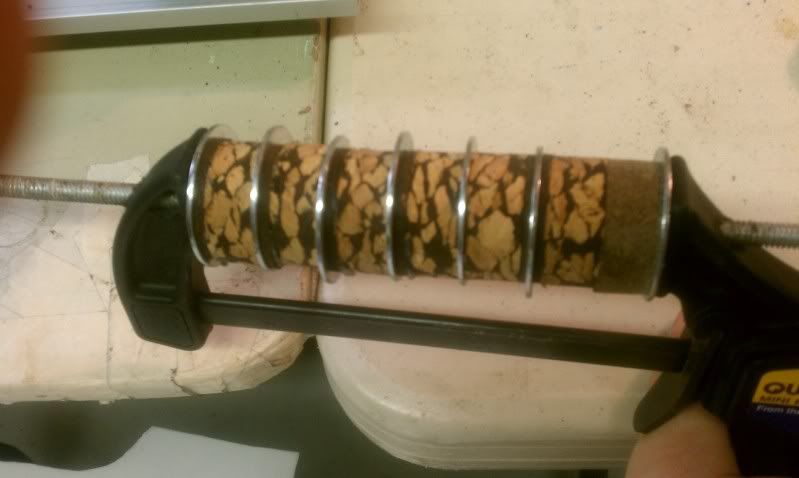
The modified quick clamp is a simple cheap quick clamp with a ¼ hole drilled in the front and back clamp arms. These holes will allow the threaded rod to pass freely in the clamp and the clamp arms can apply equal pressure on the washers at either end of the stack.
After the epoxy has setup on the stack and checker board rings we can complete the final glue-up process.
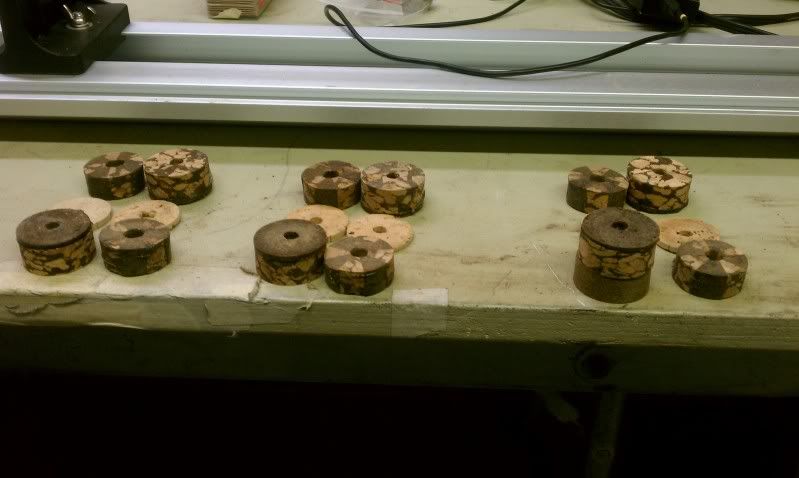
Follow the same process used to create the stack above for the final grip glue-up. Don’t worry if the checkered rings are a smaller diameter than the other rings. You will even everything out when you sand and shape the grip.
Here is the result after shaping, reaming and installing the grips to the blank. The shaping, reaming and grip installation is covered earlier in this thread.
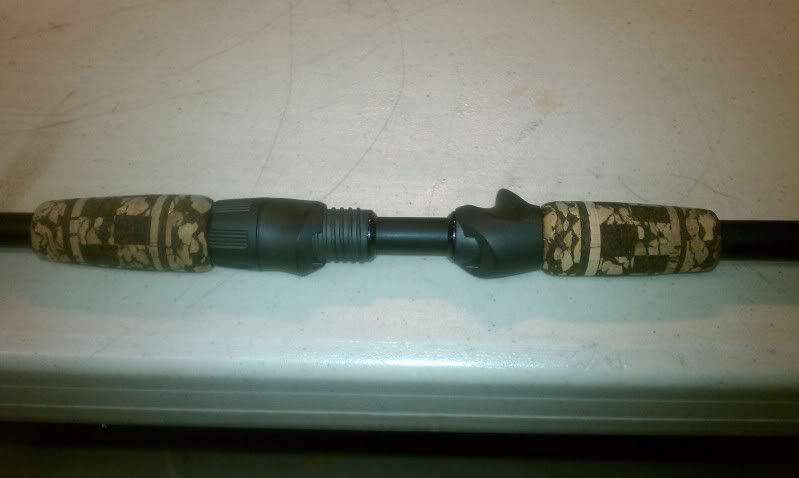
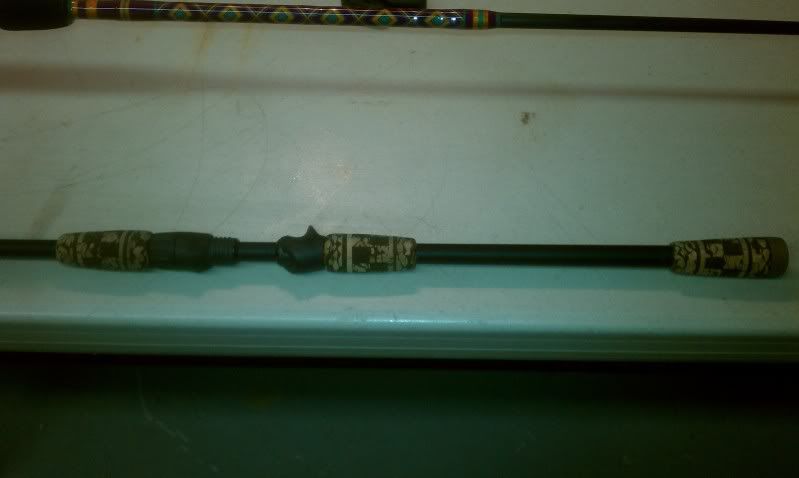
I have a special MKF thread weave to cover in a later writeup. As always let me know if you have any questions.
Comment
-
Attached from Part 2 of the guide.
Basic Thread Weaving
I decided to do something special for this site in this writeup. Lets look at the process involved in basic pattern weaving. I am in no way an expert at weaves. I have done several over the years ranging from simple names and initials to single color logos. These types of weaves are the most basic and involve one base wrap thread and single color pattern threads. So what are the base wrap and pattern threads?
The base wrap thread is the base thread that wraps around and up the blank. This is the base in which the pattern threads are weaved in and out of. This thread will be a continuous wrap up the blank. The Pattern threads are the group of threads laying parallel to the blank. The pattern threads can consist of a single color or multi colors (Layers) for more complex color changing weaves.
The weave patterns are also broke up into thread counts for both vertical (base wrap) and Horizontal (Pattern Threads). For example a weave with a thread count of 120 X 60 would have 120 Base wraps around the rod and 60 pattern threads. The base wraps always wrap around the rod and the pattern threads are either moved to the left or right of the pattern. The pattern thread movement to the left or right is dictated by the weave pattern. A pattern thread that is to the right will be hidden under the base wrap and a pattern thread to the left will show up on top of the base wrap. The movement of these threads left and right with the continuous base wrap up the blank creates the weave.
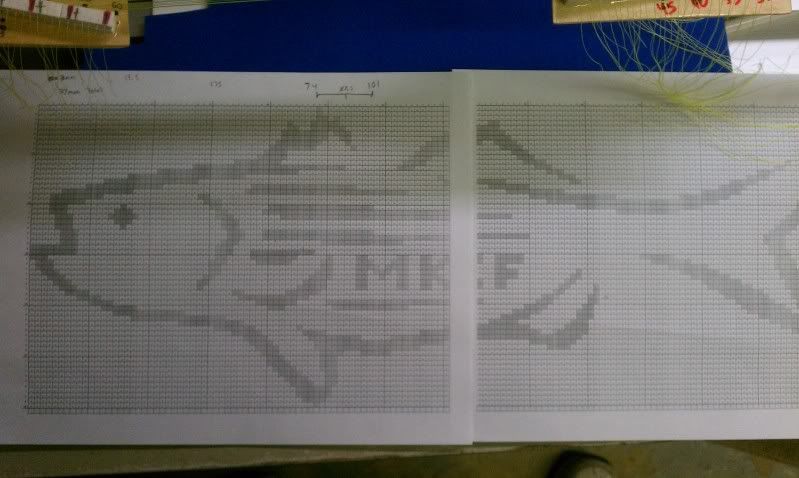
No how do you turn a logo, Name, or image to a weave? There is software around that will convert images into Left lists and label everything nicely. You can also buy patterns from several vendors that do all the dirty work for you. But what if you have a custom logo say the Maryland Kayak Fishing logo? How do we convert this logo into a nice weave on a fishing rod? There is no easy way minus the options I mentioned above. You will have to somehow transpose the image onto a graph and then mark the cells where a pattern thread is present. Every cell containing a pattern thread will become a Left thread. Any space void of a pattern thread will become a Right Thread. So what does the final left list look like?
Here is the full pattern left list I created for the sites logo. Thanks Grilled Sardine for permission to use this artwork.
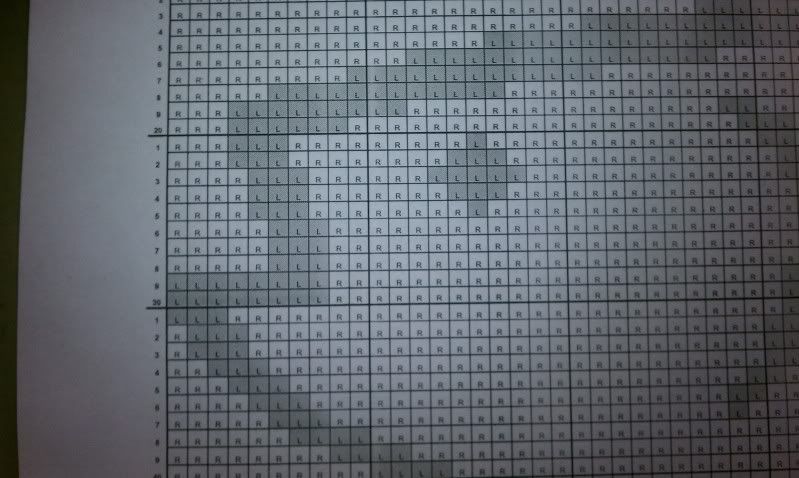
Lets zoom in and see whats going on in this pattern.
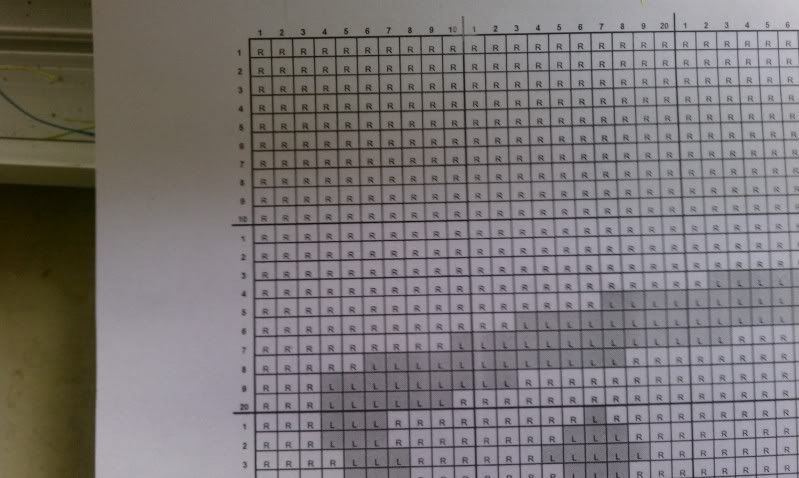
As you see the pattern is broken up into Segments. 1 thru 10 on the horizontal (Base Wrap) and 1 thru 10 on the vertical (Pattern Threads). This numbering continues in the next segment for the 20's, 30's up to the pattern end. This numbering is the thread count of the pattern mentioned earlier. Every Vertical column relates to a full base wrap around the rod. Every horizontal row relates to a single pattern thread. In this example our pattern will be 133 x 60 (133 base wraps and it will contain 60 pattern threads).
Looking closer we can see the pattern threads left and right rules spanning across the weave. These markers will tell us when to move a pattern thread to the left or right.
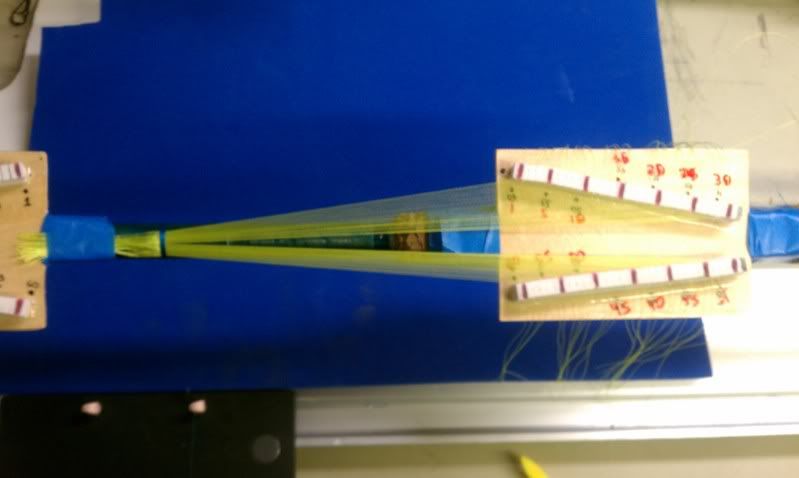
Now how do we get this on the rod? We need a way to hold 60 horizontal threads parallel to the blank and at the same time keep track of all these threads individually. The answer to this is a weaving loom (Jig). You can buy pre-made looms from vendors ranging form 40 pattern threads to looms that allow you to weave around the whole circumference of the blank.
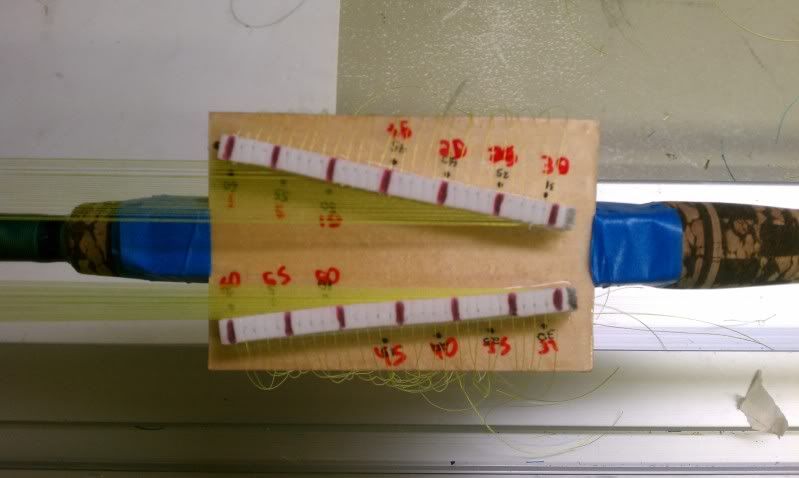
For the basic weaves I have made a simple loom using scrap wood and some foam strips glued in place. Slits were cut into the foam strips to hold the threads and I marked the thread counts relating to location. As you see not only did I mis count when I originally labeled everything a also reversed on side. This explains the messy and mislabeled loom.
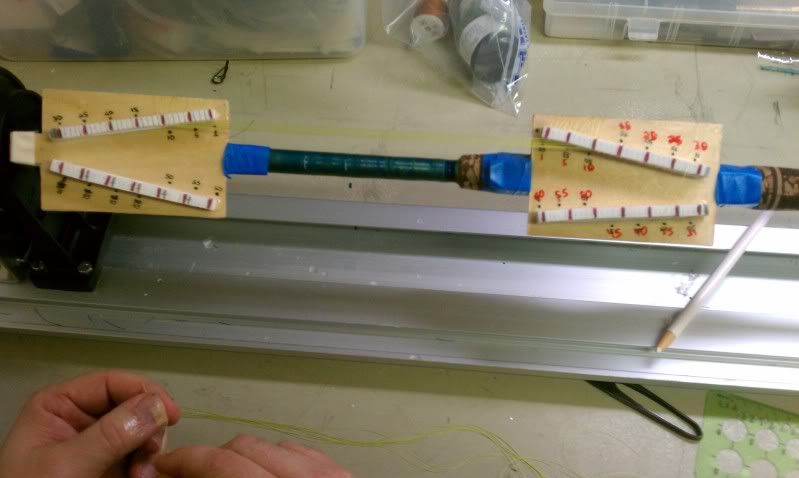
The loom will need to be secured to the blank with tape on either side of the weaves intended location. The pattern thread will be cut to size and inserted into both sides of the loom running parallel to the blank.
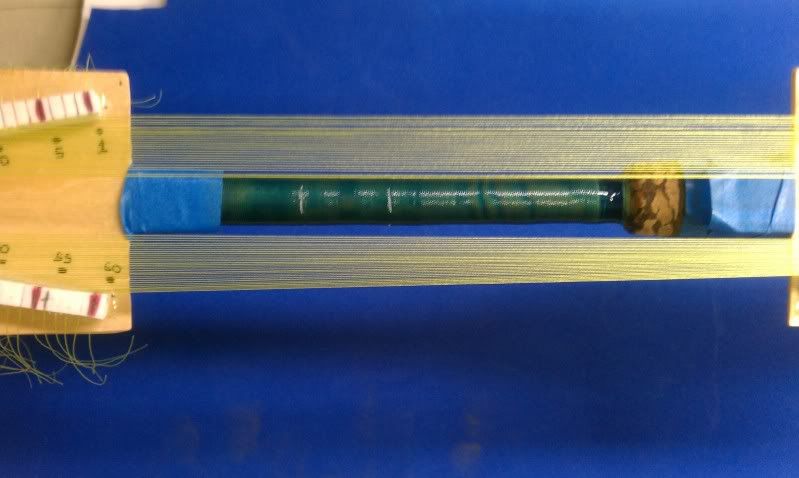
Leave 3 or 4 inches of extra thread hanging off the right side of the loom. You will need this extra thread when snugging down the base wrap.
Comment
-
Continued
Once you have all the pattern threads setup you will need to start the base wrap on top of the pattern threads. Make several passes and lock the base wrap down.
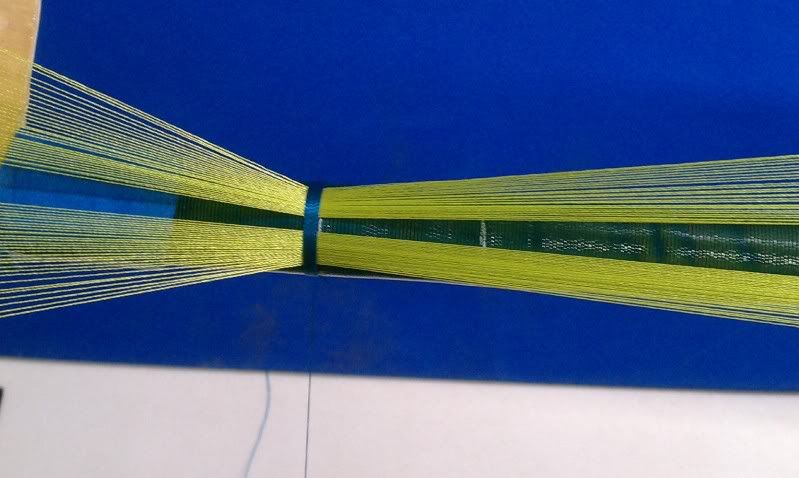
When you have the base wrap secured bunch the pattern threads together. You want them to be as close together at the intersection of the base wrap as possible. Make sure you do not have any threads crossed or overlapping.
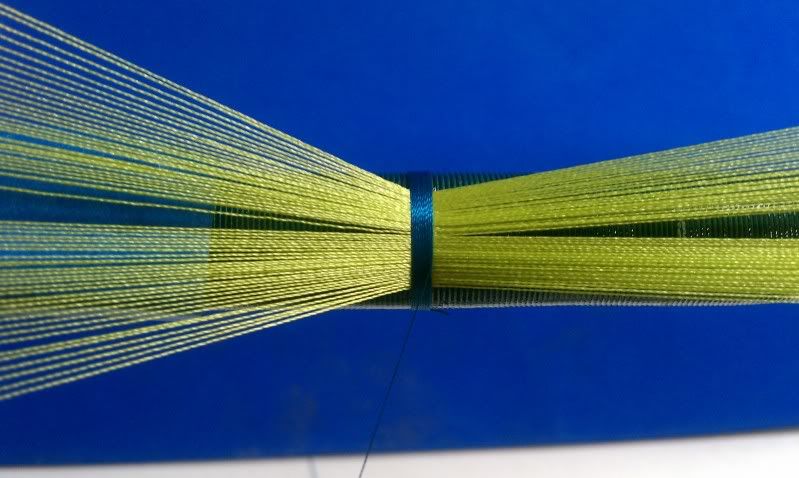
You will now need to trim the left side threads and remove the ends from the left loom. Keep the left side tags coming from under the base wrap several inches long to aid in snugging up the pattern later. Tape the cut threads to the blank to keep them secure and out of the way.
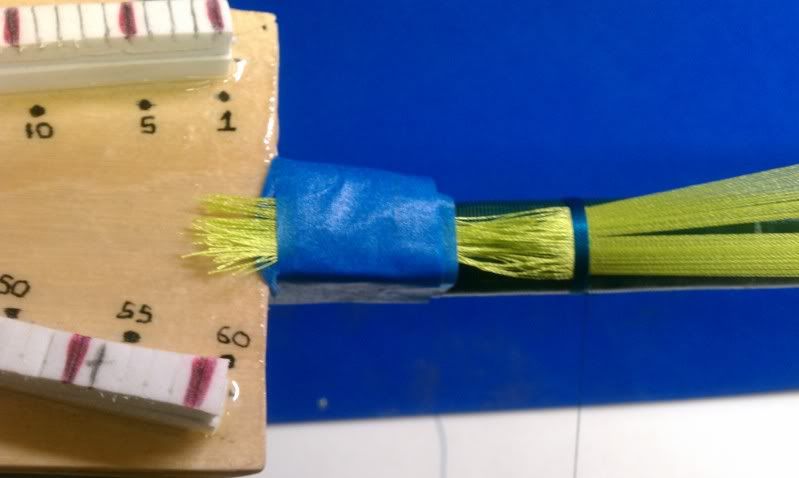
The loom is not setup for the weave.
Comment
-
Continued
Now its just a process of following the left list for the pattern. Use a ruler to mark completed columns as you go. The most important part of the process is keeping track of where you are in the pattern.
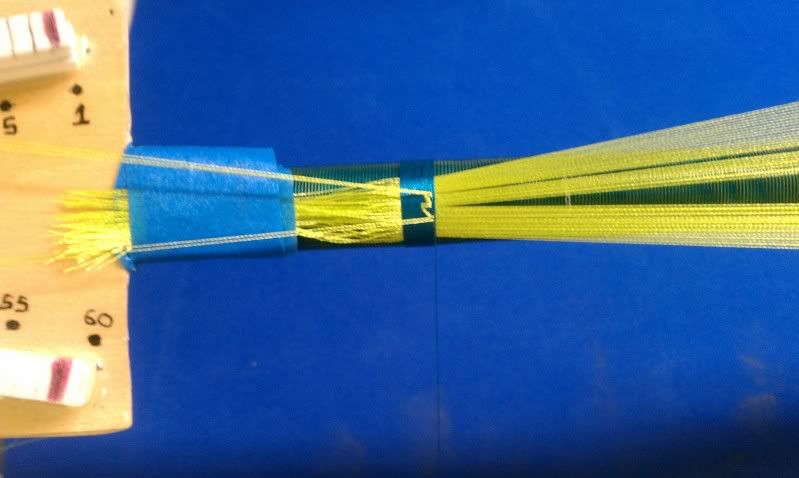
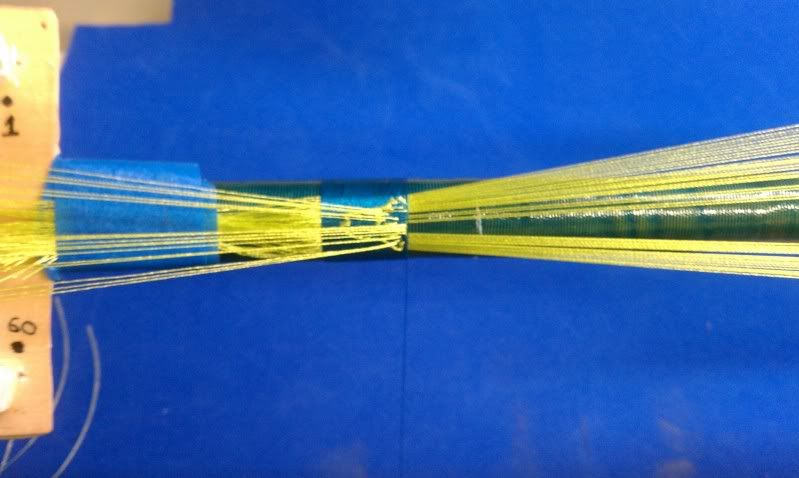
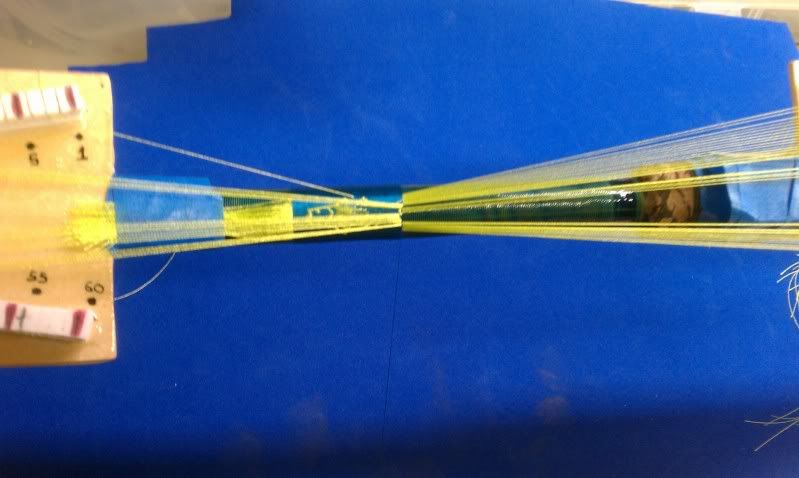
Here is the final product. We left the tags on to allow us to snug up the pattern.
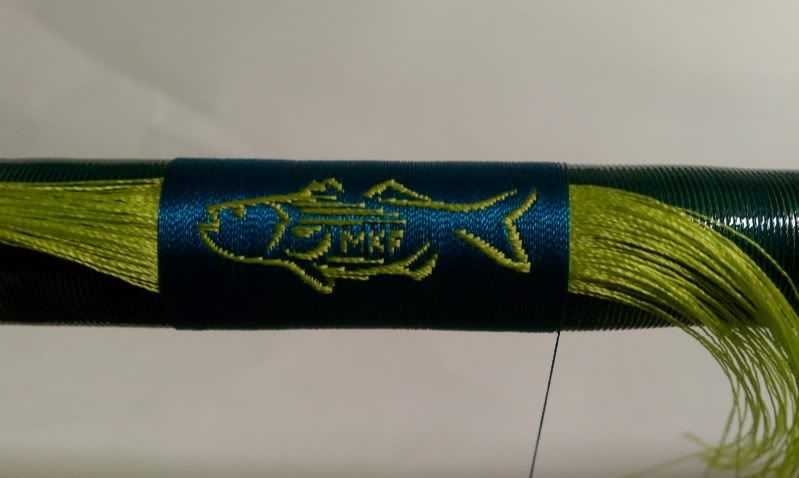
And with some trim rings and everything tidy waiting for a coat of epoxy.
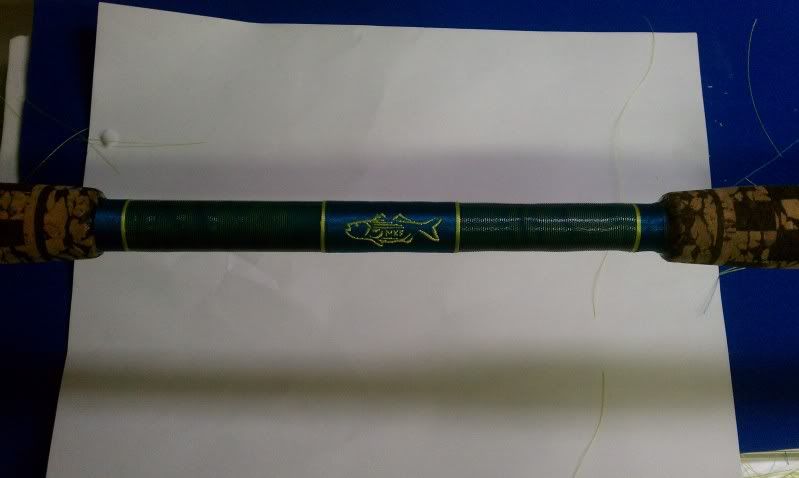
This rod will have some good Mojo with that logo. I cant wait to jig up something.
Comment

Comment